In this tutorial I will go over how to issue an SSL certificate for your WordPress site that is hosted on AWS Lightsail. If your site is hosted somewhere else and you’d like to host it onto Lightsail, please follow my other tutorial here.
I will assume that you already have a Lightsail account on Amazon Web Services and you already have a WordPress site with a domain attached to it. If not, please follow this tutorial first.
The steps below will be mostly executed on the SSH Browser for your AWS Lightsail instance.
💡If you’d like to issue a FREE SSL Certificate using Let’s Encrypt with automatic renewals, follow this tutorial instead: (link)
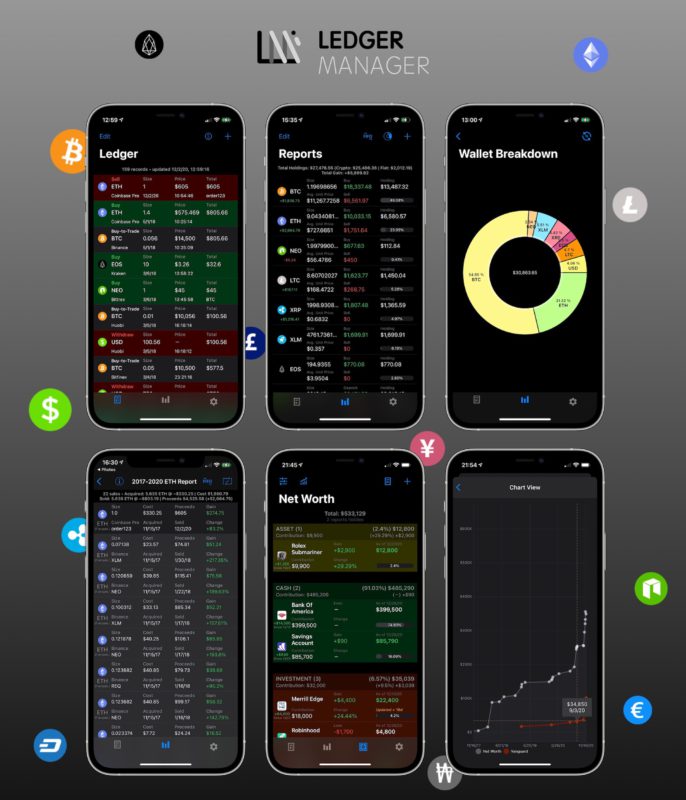
Ledger Manager
Check out my iOS app which facilitates recording crypto transactions (Bitcoin, Ethereum, etc.), simplifies tax reporting & reports on overall net worth!
*Everything is synced privately on your iCloud account.
**Helps getting your crypto tax reporting in order (Form 8949) with smart calculation of cost basis & acquisition dates.
STEP 1: Generating the Private Key and CSR
In order to generate an SSL certificate, you need to have a .csr file to give to the SSL certificate authority aka “CA” (e.g.: Comodo, etc.). To generate that CSR file, you need to do it on the machine (SSH into it).
- Open the SSH Browser for that Lightsail instance.
- Issue that command in the SSH browser:
sudo openssl genrsa -out /opt/bitnami/apache2/conf/server.key 2048 - Now using that private key we just created above, let’s generate the certificate CSR file:
sudo openssl req -new -key /opt/bitnami/apache2/conf/server.key -out /opt/bitnami/apache2/conf/cert.csr - When asked about Country, State, etc, fill in whatever you think is correct.
- Regarding the “Common Name”, enter your domain (e.g.: “example.com”)
- Back up your private key in a safe location as such:
sudo openssl rsa -des3 -in /opt/bitnami/apache2/conf/server.key -out privkey.pem- When asked for a passcode enter something you can remember.
- That file will end up in the root director:
/home/bitnami/privkey.pem
- Issue the following command so that it doesn’t require a passcode every time:
sudo openssl rsa -in privkey.pem -out /opt/bitnami/apache2/conf/server.key- This will update the
server.keyfile with your real instance credentials (RSA).
- This will update the
🏁 Up until this point, you should have a server.key and cert.csr on your lightsail instance. This step will not be repeated in the future when the time comes to renew the SSL certificate in 2 years or so.
STEP 2: Requesting the SSL Certificate from the Certificate Authority
Now that you have those files created in STEP 1 on your lightsail instance, you will need to access them to provide them to the issuing authority.
- I usually buy my certificates from ssls.com, they have affordable ones for like $7 for 2 years kinda thing.
- If you already had an SSL certificate that you previously purchased, you need to follow their user interface options to re-issue it.

- They will prompt you to provide the CSR file for your server that will be hosting that SSL certificate.
- Ignore that command they provide, as we already issued our CSR on the lightsail instance in STEP 1.
- Let’s view the content of that CSR file we generated earlier. On the SSH Browser, type:
vi /opt/bitnami/apache2/conf/cert.csr - Copy the content of the certificate in its entirety (including the “—–” at the beginning and end.)
- Paste it in the box on ssls.com
- They will validate that it’s for the right domain, and allow you to proceed.
- Follow the on-screen instructions to verify that you own that domain. I usually pick the option to send me the email to “admin@example.com”.
- Once you receive the email, click and validate it by following their instructions.
- They will be sending another email with the SSL certificate, in a zip file, as well as in text format.
- Download the files you received, rename them as follows:
- From
example_com.ca-bundletoserver-ca.crt - From
example_com.crttoserver.crt
- From
🏁 At this point you have your SSL certificate ready on your local machine. It’s time to upload them on the Lightsail AWS instance.
STEP 3: Uploading the SSL Certificate to Lightsail AWS Instance
As usual, you want to execute the following on the SSH Browser of your Lightsail instance.
- First, stop the running services (apache):
sudo /opt/bitnami/ctlscript.sh stop - Assign the domain and wildcard environment variables:
DOMAIN=example.comWILDCARD=*.$DOMAIN
- Double-check that the changes took effect:
echo $DOMAIN && echo $WILDCARD. That should show your domain. - Rename the existing files that came from initially deploying the WordPress plain site when the Lightsail instance was first created:
sudo mv /opt/bitnami/apache2/conf/server.crt /opt/bitnami/apache2/conf/server.crt.oldsudo mv /opt/bitnami/apache2/conf/server.csr /opt/bitnami/apache2/conf/server.csr.old- ℹ️ You don’t need to rename the
server.keyas we created a new one in STEP 1 for our newly created instance.
- If you got a Certificate Authority (CA) bundle (I was getting this from ssls.com)
- Locate the apache configuration file:
vi /opt/bitnami/apache2/conf/bitnami/bitnami.conf - Add the following lines below the
SSLCertificateKeyFile:- If your apache version is
< 2.4.8(mine was 2.4.39), then add this:SSLCertificateChainFile "/opt/bitnami/apache2/conf/server-ca.crt" - Otherwise if
>= 2.4.8:SSLCACertificateFile "/opt/bitnami/apache2/conf/server-ca.crt" - ℹ️ To edit the file, hit
ion your keyboard. - ℹ️ To check which apache version:
apachectl -V
- If your apache version is
- Save changes.
- ℹ️ Hit
ESCkey on your keyboard, then type:wqthenENTERto save changes. Otherwise type:qto discard any changes you’ve made.
- ℹ️ Hit
- Locate the apache configuration file:
- Upload the renamed files we downloaded in STEP 2 and renamed them as
server-ca.crtandserver.crtto:/opt/bitnami/apache2/conf/- You can use an FTP application like “Cyberduck” to upload them.
- To connect using Cyberduck:
- Add a new connection.
- Pick
SFTP (SSH File Transfer Protocol)as the type. - Enter your static IP as the Server.
- Username:
bitnami - You will need to download the SSH credentials for your instance, you can find them in Lightsail, under that instance, security or something there, you can easily find it and download it. You should get a
.pemfile. - Skip the password and click SSH Private Key > select the downloaded
.pemfile.
- At this point you should have on your instance under
/opt/bitnami/apache2/conf/:cert.csr: which you generated in the prev section and will not change in the future.server.key: which you generated in the prev section and will not change in the future.server.crt: which you downloaded from the certificate authority zip file and renamed as is.server-ca.crt: which you also downloaded from the certificate authority zip file and renamed it.
- Execute this command to allow them to be readable by the root user:
sudo chown root:root /opt/bitnami/apache2/conf/server*sudo chmod 600 /opt/bitnami/apache2/conf/server*
- Ensure that the
DOMAINandWILDCARDare still set:echo $DOMAIN && echo $WILDCARD- If not, set them again by following the steps at the beginning of STEP 3 section.
- Ensure that Port 443 is opened from the Lightsail console > Networking (
HTTPS TCP 443) - Restart the apache server from the lightsail console.
- After the instance has restarted, SSH into it using the browser.
- Execute this command just in case the services didn’t boot back up (won’t hurt to just issue the command anyway):
sudo /opt/bitnami/ctlscript.sh start- If for any reason you get “httpd could not be started”. It means that the CSR/key and SSL certification don’t match:
AH02565: Certificate and private key localhost:443:0 from /opt/bitnami/apache2/conf/server.crt and /opt/bitnami/apache2/conf/server.key do not match - You can see that error above in your apache
error_logfile under/.../apache2/logs/directory. - Going to www.example.com will not open the page. Your server is busted due to the SSL certificate causing issues.
- You might have used the wrong server.key/cert.csr to generate the files on ssls.com (the certificate authority).
- Repeat STEP 1 & 2 in the above sections.
- If for any reason you get “httpd could not be started”. It means that the CSR/key and SSL certification don’t match:
🏁 Verify that your site loads file without warnings by going to “https://www.example.com/”. For now just type the “https” with and without the “www” and that the lock is shown. You might need to wait a few mins for SSL propagation to occur.
STEP 4: Integrate the SSL Certificate into WordPress
In the earlier steps we issued the SSL certificate, uploaded it to our site which is all great. But WordPress doesn’t know that you have an SSL, so it needs to update the permalinks to server everything with https.
- To do that, you will need to install a plugin called “Really Simple SSL“.
- Before activating it, allow it to write to the
wp-config.phpfile:sudo chmod 666 /opt/bitnami/apps/wordpress/htdocs/wp-config.php - Refresh the WordPress dashboard and navigate to plugins, find Really Simple SSL.
- Activate it and make sure it shows the checkmarks:

- Try navigating to your wp-config.php file to see if Really Simple SSL was able to inject its bits at the end of the file:
vi /opt/bitnami/apps/wordpress/htdocs/wp-config.php- Scroll to the bottom of the file. If you don’t see the Really Simple SSL part, then add it manually and save your changes
:wq:
//Begin Really Simple SSL session cookie settings
@ini_set('session.cookie_httponly', true);
@ini_set('session.cookie_secure', true);
@ini_set('session.use_only_cookies', true);
//END Really Simple SSL cookie settings- You might need to add the Really Simple SSL part manually in the
.htaccessof your site:- Enter:
vi /home/bitnami/apps/wordpress/htdocs/.htaccess - This is the content of my
.htaccess:
- Enter:
# BEGIN WordPress
# The directives (lines) between `BEGIN WordPress` and `END WordPress` are
# dynamically generated, and should only be modified via WordPress filters.
# Any changes to the directives between these markers will be overwritten.
<IfModule mod_rewrite.c>
RewriteEngine On
RewriteBase /
RewriteRule ^index\.php$ - [L]
RewriteCond %{REQUEST_FILENAME} !-f
RewriteCond %{REQUEST_FILENAME} !-d
RewriteRule . /index.php [L]
</IfModule>

# END WordPress

# BEGIN rlrssslReallySimpleSSL rsssl_version[3.3.4]
<IfModule mod_rewrite.c>
RewriteEngine on
RewriteCond %{HTTPS} !=on [NC]
RewriteRule ^(.*)$ https://%{HTTP_HOST}/$1 [R=301,L]
</IfModule>
# END rlrssslReallySimpleSSL
I also tried a couple of redirects to make the site automatically redirect from www to non-www but I couldn’t get it to work.
🏁 Now verify that going to http://www.example.com automatically redirects to https://www.example.com. The same goes with http://example.com should auto redirect to https://example.com
Renewing the SSL Certificate Upon Expiration
Repeat STEP 2 & 3 only!
Here are some references I used for this post:
- https://docs.bitnami.com/aws/apps/wordpress/administration/create-ssl-certificate-apache/
- https://docs.bitnami.com/aws/apps/wordpress/administration/enable-https-ssl-apache/
- https://lightsail.aws.amazon.com/ls/docs/en_us/articles/amazon-lightsail-using-lets-encrypt-certificates-with-wordpress
- Only used the last parts (Step 7, Step 8), not in between to get the certificate as I use an authority and not Let’s Encrypt.
I hope this tutorial was extensive and helped you out, please share it with others and subscribe for more content, I would really appreciate it! 🍻
Ledger Manager
Check out my iOS app which facilitates recording crypto transactions (Bitcoin, Ethereum, etc.), simplifies tax reporting & reports on overall net worth!
*Everything is synced privately on your iCloud account.
**Helps getting your crypto tax reporting in order (Form 8949) with smart calculation of cost basis & acquisition dates.
I’m lost at “Save changes.” under step 3. I thought it was Control X then Y but it is not working. Esc seems to exit the insert mode but how do I actually save the changes to the config file in this SSH
Hey Rae, sorry for the late reply. I’ve updated my post if you still haven’t figured it out by now. You basically type `:wq` then `ENTER` to save changes. Hope that helps!
why did you no show how to do this with AWS certificate manger?
there is no reason to go out an buy SSL from 3rd party vendors, when you already have an AWS account
I’ve covered how to issue a FREE SSL using Let’s Encrypt here:
https://karlboghossian.com/2020/04/26/using-lets-encrypt-ssl-certificate-with-auto-renew-on-wordpress-site-hosted-on-aws-lightsail/